Showing posts with label muslin. Show all posts

Sunday, 19 February 2012

Chantilly - fitting #3

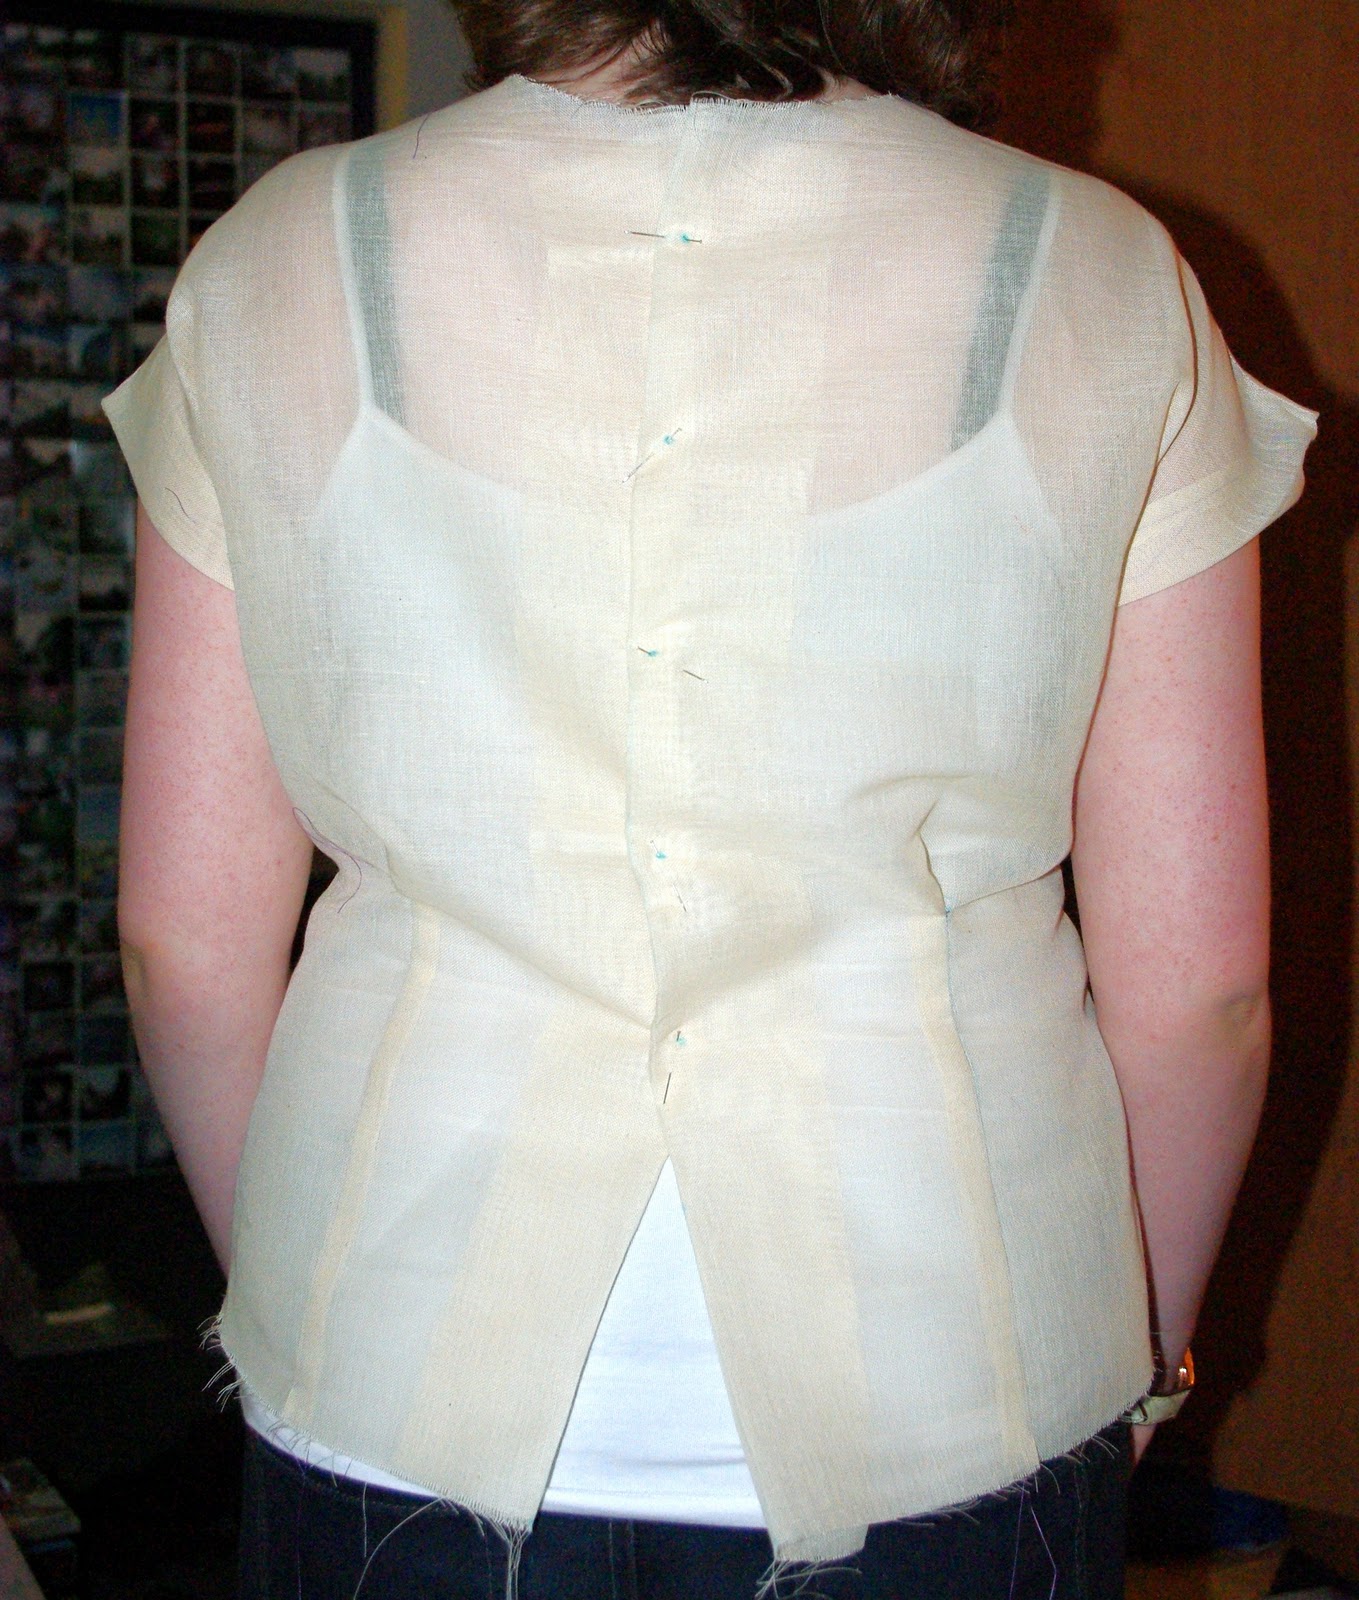
The wrinkles from before are much better. Still there, but much better. I think with the weight of a full gathered skirt, they won't be very noticeable. I'm happy with the back now. Especially considering what I started with! 
I was all excited to get started tonight, when I remembered I haven't washed the fashion fabric! This might not seem like much of a problem to most of you, I can just pop it in now and it'll be ready later right? Nope. As we're in student accommodation, we have to use the on site laundrette. We usually do our washing early in the morning as no one else does. Trying to find an unoccupied washer at this time of day is impossible! So it'll have to wait till morning. I can start on the lining tonight though, as it's polyester so doesn't need pre-washing :)
Also, I'm making a spinach and cheese flan tonight with cheesey pastry! Yum! :)
Ashley x

Thursday, 2 February 2012

Chantilly - fitting #2

I've cut the seam allowances away from the waist and armholes. Lucy was right, I need to pinch out a little from the arm hole. I've transferred this to the pattern piece. Now here's the back before:
And after:
Much much better! But still not perfect. Hmm. Any ideas on those diagonal wrinkles under my arms? I think part of the problem is the darts, as the tuck I took out made the darts point towards the seam line. I've fixed this on the pattern piece so the darts are now parallel to the side seam as they were before. I also think it might be because the neckline part of the back piece is now angled downwards. So I've added a little height back to the centre back neckline and smoothed the line out.
I'm going to muslin the back again with these changes, but before I do that does anyone have any idea what could be causing those wrinkles? The changes I made were just guess work. 
Ashley x
p.s. Yesterday was weigh in day. I lost 0.8lbs and a total of 2.5 inches. Also, the waist on the Chantilly muslin isn't as super snug :)

Update After doing some googling, it seems adding a little height to the centre back was the right thing to do. I came across several sources that said diagonal wrinkles from the underarm to centre back indicate there is not enough length between the neck and the waist. So. . . another muslin is order!

Saturday, 28 January 2012

Chantilly - fitting


Look!! Actual sewing has taken place! Well, kind of, it is only a muslin/toile but still! Please excuse the tummy ;) It's quite snug, but that's what I aimed for what with the weight loss/gym thing. (As a side note, my first weigh in was last Wednesday, and I lost a pound and a total of 5 inches!). 
On to the fitting! I came up with a cunning plan for the fitting. As the yoke is completely separate, I cut the size 6 so it would fit my shoulders. Then I cut a 6 for the armholes and graded out to a 12 (yep, 3 whole sizes bigger and it's still snug! Ick!). It worked pretty well!
The front fits really well I think. I wasn't sure if it was a little tight across the chest but Dom says he thinks it's ok. Opinions please? Bearing in mind that when I lose weight, it comes off my boobs a little too. As I said, it's snug across the waist but I'm ok with that for now. 
The back needs a tuck taken out horizontally. Dom pinned it out for me and I need to tuck out about an inch. Apart from that I think it's ok. Once I've taken the tuck out of the back bodice piece, I'm happy to start on the real thing :) (Unless you think I should add a little width across the bust?)
This is such a pretty pattern! I absolutely love it, and I think I'll be making more for summer dresses :)
Ashley x

Sunday, 2 October 2011

Pendrell Dress - part 3

Here's the second muslin of my Pendrell dress. It's much better, the only problem now (apart from the hastily pressed seams over my tummy) is the bagginess under the bust. Hmm, I complained about it to Dom as he was taking the photo, and he said it looked like if I pulled it up over my chest it would be fine. So . . .
Ahh! The bust fullness was in the wrong place! So I measured how much I had to move it up by and have transferred that to the paper pattern. I'm glad Dom spotted it, as I was just going to pinch the extra fabric out, but it turned out I need it! I knew I kept him for a reason ;)
I also measured the centre back seam on my inspiration dress and then measured the centre back on the Pendrell. The difference was 5.5 inches so I added 1.5 inch to account for the hem. This gives me a little extra length to play with too if I want it. So I've lengthened the pattern pieces by 7 inches and also tapered them out to roughly match the skirt of my inspiration dress. Then I ran out of tissue paper. . .
So tomorrow I'm going to pick up some more tissue paper and draft a collar. I'm also considering an exposed zipper. My inspiration dress has a metal exposed zipper, and I love the look. And I haven't learnt a new skill like that in a while. I guess it depends on whether the haberdashery stall even has metal zippers! I think I'll look online. I'm also going to trace new front pieces as they're very hard to pin in their current sticky taped state!
I hope you're all enjoying your weekend :)
Ashley x

Sunday, 18 September 2011

Pendrell Dress - part 2

First of all, thank you to Very Berry Handmade for the amazing giveaway a couple of weeks ago! I won a package of 4 fat quarters! Polka dot fat quarters no less!
I'm not sure what to make with them yet, any ideas? Tutorials? Let me know! :)
It's been over a week since my last post, how did that happen?! Well, life ran away with me. There were birthdays, cupboards of my left behind junk at my mums to sort through, helping my brother get into college and a lack of motivation to do much of anything craft related. I've been restless and haven't felt like sitting down to concentrate on anything. 
Anyway, this morning I finally got round to transferring the changes I made to the Pendrell dress muslin! To do it, I marked where the pins had been with a sharpie marker. So I ended up with this:

Then I laid my paper pattern over the top and roughly traced the marks. I measured everything to make sure, and then made the lines smooth and redrew the new seam allowance. I also added just a smidge to the side seam at bust level. 


I just have to trim the pieces where there are new seam allowances and then I can start on the muslin! Before starting on the real thing, I'm going to trace the pieces out again so I have nice fresh sellotape-free pieces :)
I also finished the first Rosebud sock a while ago! Here it is:
It stretches out when it's on my foot and the lace is lovely :) Though currently its a little tight getting it over my heel, so I think I'll give it a gentle stretching out when I wash them like I did with my Snapdragon gloves.
Oh, and we had this stunning view from our window the other day!
Happy Sunday! :)
Ashley x

Thursday, 8 September 2011

Pendrell Dress - part 1

So I've decided to make the Pendrell blouse pattern into a fitted dress. Why? Because I want a princess seamed dress and the Pendrell blouse is the closest thing I have. 
The inspiration for this comes from one of the dresses I bought last week. It fits surprisingly well, and I love how flattering the princess seams are. 
Excuse the shoeless-ness. I love the shape of this dress, and the neck line detail is amazing (I'm sure there was a tutorial on the Colette blog a while ago, but I can't remember what the technique is called to search for it!). I wear the dress with a belt at the waist too, so it makes my waist look nice and small :) What surprises me most about this dress is that it's a Miss Selfridge dress! It was the most expensive dress that I bought (though I got student discount on it as I bought it from House of Fraser). The dress is a size 14 but it fits! I think a 16 would have looked good too, but I like how close fitting it is. It was kind of an impulse buy, as I saw it in the window as we walked past. I don't usually go in House of Fraser as the floor is all wonky and it makes me feel travel sick after a few steps in there. But I wanted that dress! :) 
So the first thing I needed to do was address the extra ease in the Pendrell blouse. After studying the finished garment measurements, I decided to go two sizes smaller than what my actual measurements. I was pretty sure this would be ok. And I was right! Mostly. Here's the back:
I made no alterations to it at all! Other than to add a zip of course. Though I discovered that I can get in and out of it without the zip, but it's a tight fit and I'd rather not put too much stress on the seams. However, the front obviously required quite a large FBA. I split some of this between the front piece and did most of it on the side front piece. Here it is after pinning out some excess:
As you can see I lowered and re-shaped the neckline. Then there was some excess length in the front that I tucked out. It was also gaping out under my chest so I pinned it out. Looking at the photo I also noticed that there is a little bit of bumpy gaping going on at the sides of the neckline. The stripes also emphasise my boobs which isn't a good look! lol Thankfully none of the fabric that I have is stripey. But I think the general shape is ok, though I think I'll let it out a little in the side to give me a smidge more room in the chest. I just need to add length to make it dress length, and maybe add a bit of flare to the skirt. 
Once I have the shell fitting ok, I'm going to draft a peterpan collar (using Casey's tutorial) which will be a contrast colour in the final dress. I'm also going to test out whether the sleeve from Colette patterns Ceylon will work. If it does, then I'm also going to add a contrast colour cuff to the sleeve. If it doesn't, then I'll add a little capped sleeve and bind the rest of the armhole. 
So how on earth do I go about making my changes to my paper pattern?! And ignoring the optical illusion of the stripes, do you think the fit is ok so far? Hopefully I should have muslin number 2 ready soon once I've worked out how to transfer my changes to paper.
Ashley x

Friday, 8 July 2011

V8648 - muslin

Ok, but first I have to show you this adorable broach that Dom's little sister Imogen picked out for my birthday:
Perfect for someone who sews! :) I enjoyed Monday afternoon a lot, it was lovely to see everyone again. Mum cooked my favourite meal (curry fry, I remember my uncle teaching us to make it) and did party food! 
Anyway, back to what you're here for:
I think princess seams are the way forward! I've never managed a successful darted bodice, but I'm really pleased with the fit of this princess seamed one. All my hard work paid off! Looking at the back of the bodice, I think the narrow back adjustment was successful. So I have a narrow back! Who knew? As I've already said, I'm happy with the FBA too. The waist pieces are the right length too, though they look like they're too short. I think with the weight of the skirt, they'll be the right length though. But. . .the sleeves. I'm ditching the sleeves. The armhole is currently too big, so the sleeve pulls terribly. I unpicked the part that was pulling for these photos. I can sort the armhole, but I don't know what to do to the corresponding sleeve piece. So I'm being a coward and ditching the sleeves. It is meant to be a summer dress after all (she says, as it's pouring rain outside)! And sleeveless dresses are great for layering. Or I was thinking of using a capped sleeve piece form one of my other patterns, as I think that would be cute. What do you guys think?
So I have a couple more adjustments to make. I want to add 1.5cm to the front part of the armhole, so that when the lining is in the armhole will be where it is in the photos. Also, you can see in the photos that there was a little gaping in the neck. I think this is a result of the FBA as it happened on the birdie blouse too. So I pinned it out on the muslin (roughly!) and I need to pinch about 2cm out. As these are only minor adjustments, I'm going to make the changes to the paper pattern, then go ahead and cut out my fabric! :) I'm excited, my first dress that might actually fit!!
On a completely unrelated note, I also got some birthday money! :) I picked up 'Little Red in the City' by Ysolda Teague from Spins and Needles. This book is exactly what I've been looking for. She goes into the detail on bust shaping in knitting patterns and how to alter for a bigger bust and other fitting problems. I love how its explained, it's finally starting to make sense to me. Not only does she give advice on fitting a knitting pattern, but she also explains a few techniques that are used in the patterns that are in the book. Yep, not only do you get wonderful advice and instruction, but you also get 7 patterns! She also shows each pattern on two different body types which is helpful to see. All in all, I think I'm going to get a lot of use out of this book :) 
As well as the book, I also couldn't resist a look at the yarn. There's a scarflet pattern on Ravelry that I've had my eye on, so I picked up some yarn for that:
After reading the notes on other peoples projects on Ravelry, it looks like I'm going to need another ball! Ah well, next time I'll check first :) I also picked up some yarn to make Dom a pair of socks:
I'm so glad that I went to the sock knitting class, as I love this pattern! The yarn is DK weight on 4mm needles, so it knits up super quick for a sock. Dom thinks it's sweet that I'm knitting him some socks, and now complains that he has cold toes and that I should hurry up!
I also finished another pair for myself. I bought two balls of this yarn to make a shawl with, and ended up with a ball left over. Plenty for a pair of socks!
I didn't bother trying to get the colours in similar places on each sock, as I was only trying to use up the yarn. They turned out really well :)
More later!
Ashley x

Friday, 29 April 2011

Crescent skirt - muslin

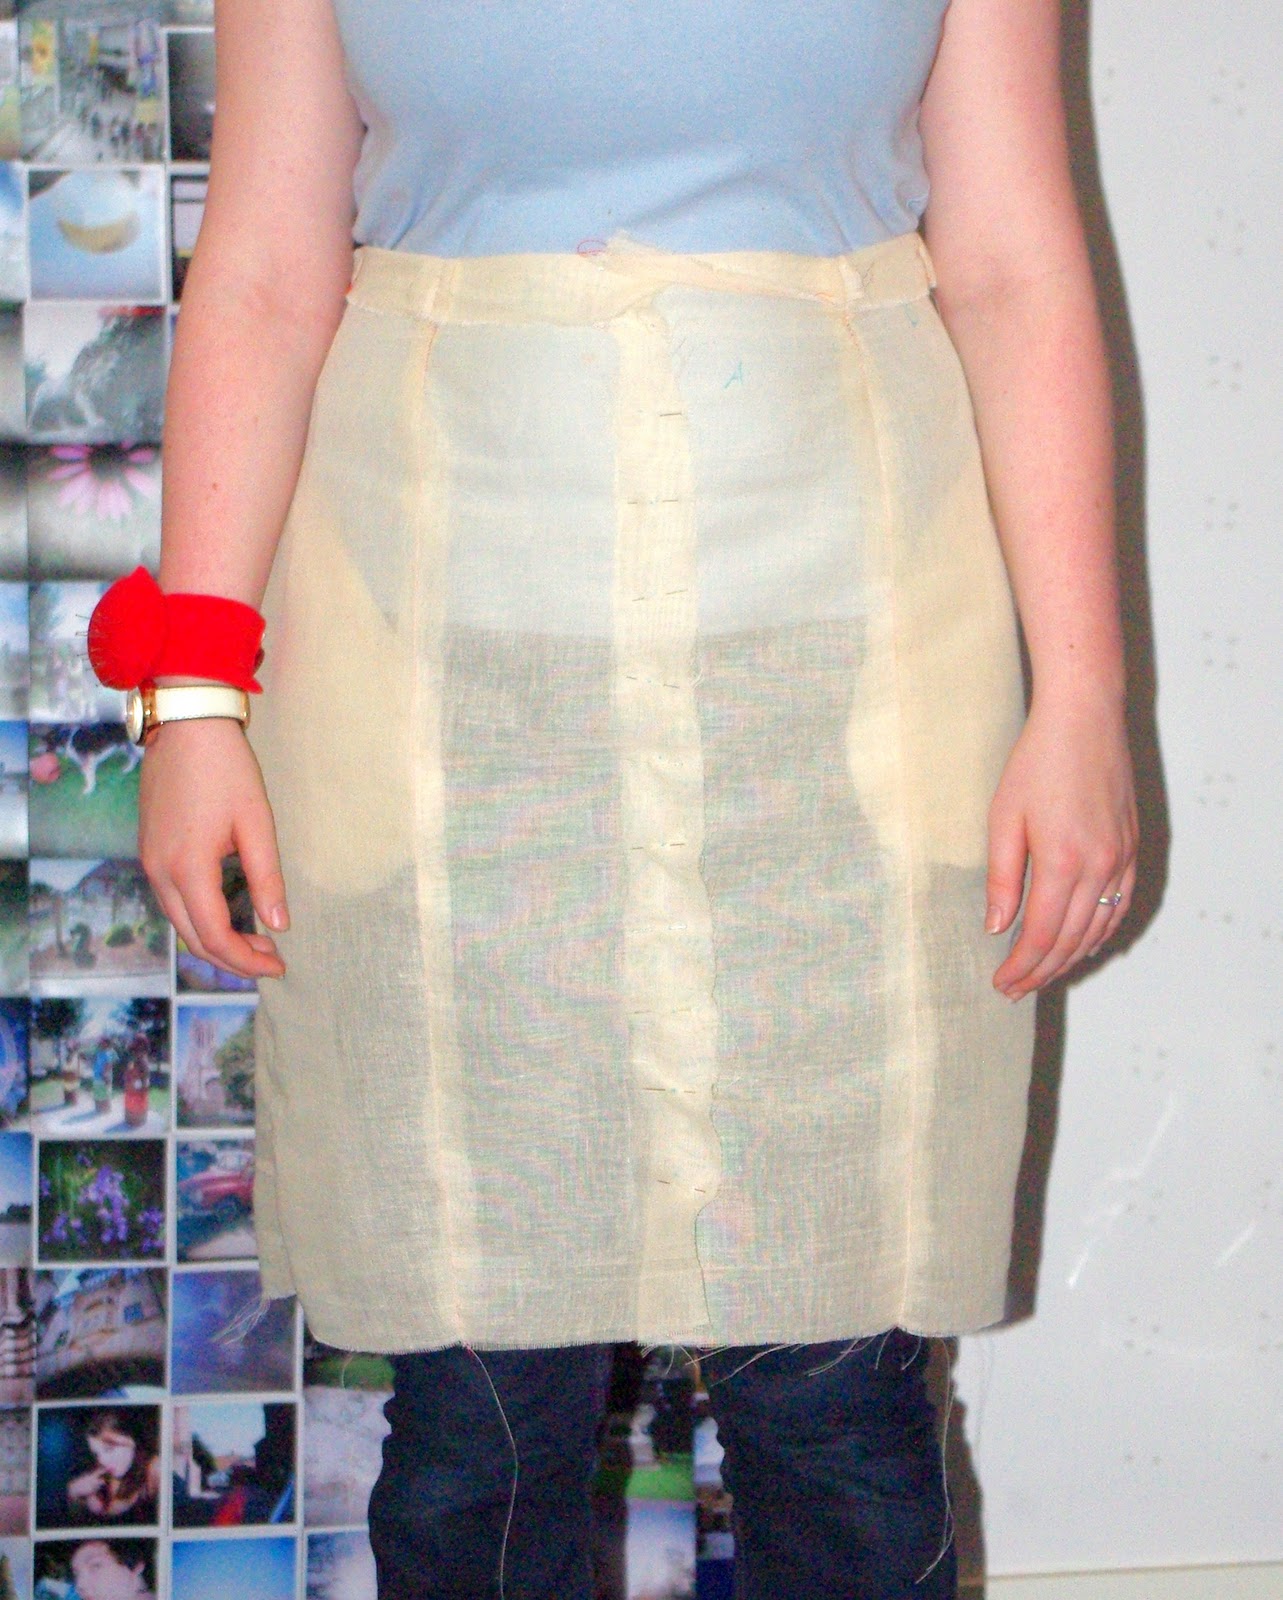
Not too bad from the front, right?
And then you see the back. . .
Ah, well, that *may* be a *smidge* too tight. Lol. I'm not sure how this happened, I traced off a size 12 at the waist grading down to an 8 at the hips. Perhaps I didn't need to grade down to the 8? Not sure, but anyway its an easy fix. I think I'm going to add about half an inch at each side seam piece, so a total of 2 inches. This will give me plenty to play around with, as I'd rather it be too big than too small. As a whole though, I love it! Such a lovely shape, and those curved seams lend so much inspiration for adding something pretty! :)
Are you participating in the Sewalong? How's it going?
Ashley x

Monday, 18 April 2011

B4985 - muslin


Overall, I'm really happy with the fit. The changes I made to the tissue were to do an FBA, and to move the waist. My neck to waist measurement is about 3 inches shorter than the norm. To fix this on the pattern I had to shorten the pieces so that the waist shaping was in the right place, then lengthen it at the bottom the same amount so it didn't end up as a crop-top! Very boring and tedious but I got there in the end. Is there an easier way to do this?
I'm going to go for the puffed sleeves as the drapey sleeves just don't sit right :S I'm also going to add a smidge to the length and to the side seams for a bit more room.
I'm really pleased with the fit, I've finally found the right starting size! I didn't have to make any changes to the upper back or shoulders which is a first! :D
I've already cut the fabric. I cut the collar upside down the first time! Luckily there was plenty left to cut another, this time with the print going the right way! Just got to cut the interfacing out.
I'll be doing a muslin of the Crescent skirt this week too! The sewalong started today and I can't wait to get going.
Now I need some advice. I'm going to end up with three projects on the go - the shirt and two crescent skirts. Any advice for staying organised? I'm thinking of making some really quick tote style bags for each project to keep everything in. These will be useful for future projects too. My main problem is space. We live in a small studio apartment so being able to put a project in a big bag and sliding it under the bed is ideal. Any other ideas?
Ashley x

Thursday, 31 March 2011

Sneak peak - Mother's Day Present (don't look mum!)

My mum asked me to make her a necklace that had something to do with her kids. So we looked around and she found these cute little girl and boy charms! There are three girl charms and two boy charms, a charm for each of us :) I also know she likes red, so to add some colour in there I used some red beads. I'll post photo's of the full things as soon as Mum has her presents! :)
Also, we did another muslin of Becky's dress. The back variation has changed again! But this time it can't change any more as I'm going to cut out today! :D
Jellybean x

Thursday, 24 March 2011

Evening gown muslin!

The pattern arrived today! I spent the day doing the adjustments :) Here are some photos:
I think the fit in the chest is great, though there wont be a seam in the middle of the real thing. I'll cut it on the fold for the real thing :)
We'll get to the photos of the back in a minute. First of all its a smidge too tight in the hips, and the front armhole is too big. Easy enough fixes. Second of all, we were playing around with the back. Becky really liked the back dipped lower.

The only problem was her bra strap. How to hide it? I had a brainwave! Here's what we came up with:
Rather messily done, but you get the idea! A cute bow back! With a strategically placed bow to hide the bra strap! Cute and practical :D Becky would also like the bottom bow to be a real bow with tails that flow down the back of the dress. I think this will look amazing. We decided that the bows will be cream, as we thought this would be a lovely contrast to the sky blue fabric (when it gets here!). Oh, and the zip will be moved to the side seam, so the bows can be sewn in properly instead of using poppers which was our first idea. Then moving the zip hit me! lol
I'll spend tomorrow working on the adjustments and making another muslin, though this time only to the hip to save on fabric :)
More soon!
Jellybean x

Sunday, 6 February 2011

Sencha muslin #2


I've made a slight change to the sleeve on my left side. From the front view pic you can't really see the difference, but you can in real life (stupid pics), but you can tell more from the back in the pics. That vertical crease from my waist to my shoulder is gone! On the front the vertical crease is less pronounced now.
After consulting the lovely ladies at The Sewing Forum, and spending an hour and a half scouring google and Flikr for photo's of other people in their Sencha blouses, I'm much happier with the fit of mine, especially after changing that sleeve. It looks like creasing is unavoidable with cut on sleeves, and this blouse is meant to be a bit baggy. So I'm happy with it, and won't mess with it anymore.
What do you think? Does it look ok? Dom says it does, but I'd appreciate your opinion too :)
Jellybean x

Saturday, 5 February 2011

Sencha muslin


This one isn't so perfect. What's with the crazy bunching under the arm and the general bagginess of that area?? Does anyone know what is causing this and how to fix it? I'd really appreciate some help :) The photo's don't how baggy it is, its pretty baggy. There's alot of excess fabric! Aside from that, I'm very happy with how it fits everywhere else. It even fits across the chest! :D
Thanks for any advice about the baggy bits :)
Jellybean x

Friday, 4 February 2011

Beignet muslin


Hurray, I got the Beignet muslin done! You'll have to excuse the scruffy t-shirt, and the fact that I thought it would be a good idea to fold down the seam allowance at the top of the skirt, only to find out when I looked at the pictures that I had folded it down waaaay too much, so all that beautiful shaping is lost. You'll just have to trust my judgement that it fits amazingly! I've done absolutely no alterations to this at all, its a straight size 12!! I must be average length in the waist to crotch, but short in the neck and waist, as the waist is right where it should be and so are the hips! :) Also, you can see I tried out the pockets. I've never done in-seam pockets before, so thought it a good idea to practice them.
I received my package from Cheapfabrics.co.uk today! I now have the lining for the Beignet skirts, and the red silk crepe. The black silk crepe was apparently out of stock, but they'll send it when they have it (how long do you think is a reasonable time to wait?). Now that I have actually seen the crepe properly I love it but have discovered that you can see my bra through it. Not a good look for me! lol. So I'm going to nip to the market tomorrow to pick up some cotton fabric to underline it with. I want cotton, no polyester! I want this as a summer top as well as a winter top, which is why I went for silk as it breathes, so to underline with polyester would defeat the object. I'm also planning on picking up thread and buttons. I have a collection of various buttons, but either they just aren't right, or there aren't enough of them.
Then its onto the pre-washing! I plan on chucking it all in together (minus the silk) with a few Colour Catchers.
I can't wait to try out the Sencha blouse too :)
Jellybean x
ps. the red thing on my wrist is a new wrist pin cussion that I made tonight :)

Friday, 21 January 2011

My first attempt at fitting

So I've made my first muslin! No pictures for you though, as you can plainly see through the muslin and I'd rather you didn't see that! I'm going to keep a look out for a stretchy white camisole top so I can wear the muslin over it and show you pictures next time.
I used the tissue fit method in Fit for real people, and it worked great! Of course, I needed Dom's help to check the fit in the back, and measure bits. I went with a size 16, though in hindsight I should have gone for the 14 for the shoulder fit.
Before I started the tissue fitting, I added 3 inches to the waist. Then the tissue fitting began, starting with the back of course! I shortened the length by 2.25 inches, and took a 0.5cm vertical tuck out of the back. I thought I had a narrow back, but I could also have started with a size 14. This made the back piece sit 'flush against my back' to use Dom's words. Now that the back was sorted I had to do the FBA. I needed a 1.5" FBA. This wasn't as scary as I thought it would be :)
I sewed up the muslin and tried it on. In fabric the shoulders were waaay to wide, 2.75 inches too wide to be exact. Also the bust apex was too low in fabric. And it hit my waist with no seam allowance left.
So for my second muslin I need to:
-move the shoulders 2.75" in, tapering down to 1" in at the neckline (if that makes sense)
-adjust the darts to work with the new bust apex
-add 1.5cm to the length.

Shouldn't be too difficult :) I hope so, at least. All this adjusting has made me realise why my first dress fit so badly! How did your first fitting attempt go?
More soon :)
Jellybean x
ps. sorry that I switch from inches to centimetres, I can't seem to stick to one!
pps. Dom is adjusting the pressure on the coffee machine so it brews the perfect shot of espresso. Its making me nervous! What if he breaks it?!

Thursday, 6 January 2011

Progress Report #2: M5731

 I finally got round to tracing that last piece! I've also done a practice of the bodice :) I wanted to practice the corset/lacing effect, and I'm glad I did. I couldn't get the cross of the ribbons to sit in the middle :( I also set in the sleeves, which was a pain, as the armholes didn't fit around the free arm on my machine. And when I tried to attach the lower sleeves it didn't match up! I got frustrated and took the easy way out. I cut a strip of fabric and simply gathered it onto the sleeve. The one on the left is only 14 inches long, and the one on the right is 25 inches long. I prefer the one on the right :) I'm not sure how long I'll make them yet, or if I'll but some lace to do it in like the pattern suggests.

 So as I said, I wasn't happy with the ribbon. Dom had a great idea, and suggested I sew little loops of ribbon into the seam, and use these to lace it up! I think it looks great! And much easier to get in the right place :)

And a close up.
One of the things I kept thinking was, these pieces are so small! I've only ever sewn for myself before, so its strange to be using such small pieces, and not being able to try it on as I go.
Also Fit for real people came! I spent yesterday reading through it, and thoroughly enjoyed it! It's very well explained, and I loved that it takes you through the alterations for people from start to finish :) I can't wait to try what I've learnt.
I ordered the fabric for Ebony's dress yesterday morning from Fabricland. I've never ordered by phone before, so was a little nervous. The bloke I spoke to was very friendly and put me right at ease. An hour after I placed my order I got a call from them asking me to confirm the colour of muslin I ordered, it was nice to know they don't just chuck any old thing in. They were a pleasure to deal with, and I love that they're a family run business too :) And the best thing? My fabric arrived this morning! The cuts are generous which is appreciated and it was all packaged well. I can't wait to get fitting with the muslin and Fit for real people! :)
The fabric for Ebony's dress is a lovely colour! The cherry colour is a bit more red than I was expecting, but I love it and it looks lovely with the pale pink :)
I might cut out the fabric later.
Jellybean x

LinkWithin

Related Posts Plugin for WordPress, Blogger...